To customize a Divi form success message, edit the message in your form's settings, or send visitors to another page with a redirect. HappyDivi Form adds links, lists and visitor details to the message, and its Pro Success Rules show a different result depending on what the visitor answered.
The moment after someone submits a form is when they are paying the most attention. "Thanks for contacting us" wastes it. This guide shows three upgrades, starting with the simplest. Divi's own Contact Form already has a Success Message and a Redirect URL setting, so if one fixed message is all you need, you may not need anything else.
Which Success Action Do You Need?
| Action | What the visitor sees | Use it when |
|---|---|---|
| Show Message | A message where the form was | You want them to stay on the page |
| Redirect | Another page, straight away | You have a full thank-you page or download page |
| Message, then Redirect | A message, then another page after a delay of up to 60 seconds | You want to confirm, then guide them onward |
Upgrade 1: Write a Message Worth Reading
Select the form module and open Form Settings. Set Default Success Action to Show Message, then write your text in Default Success Message:
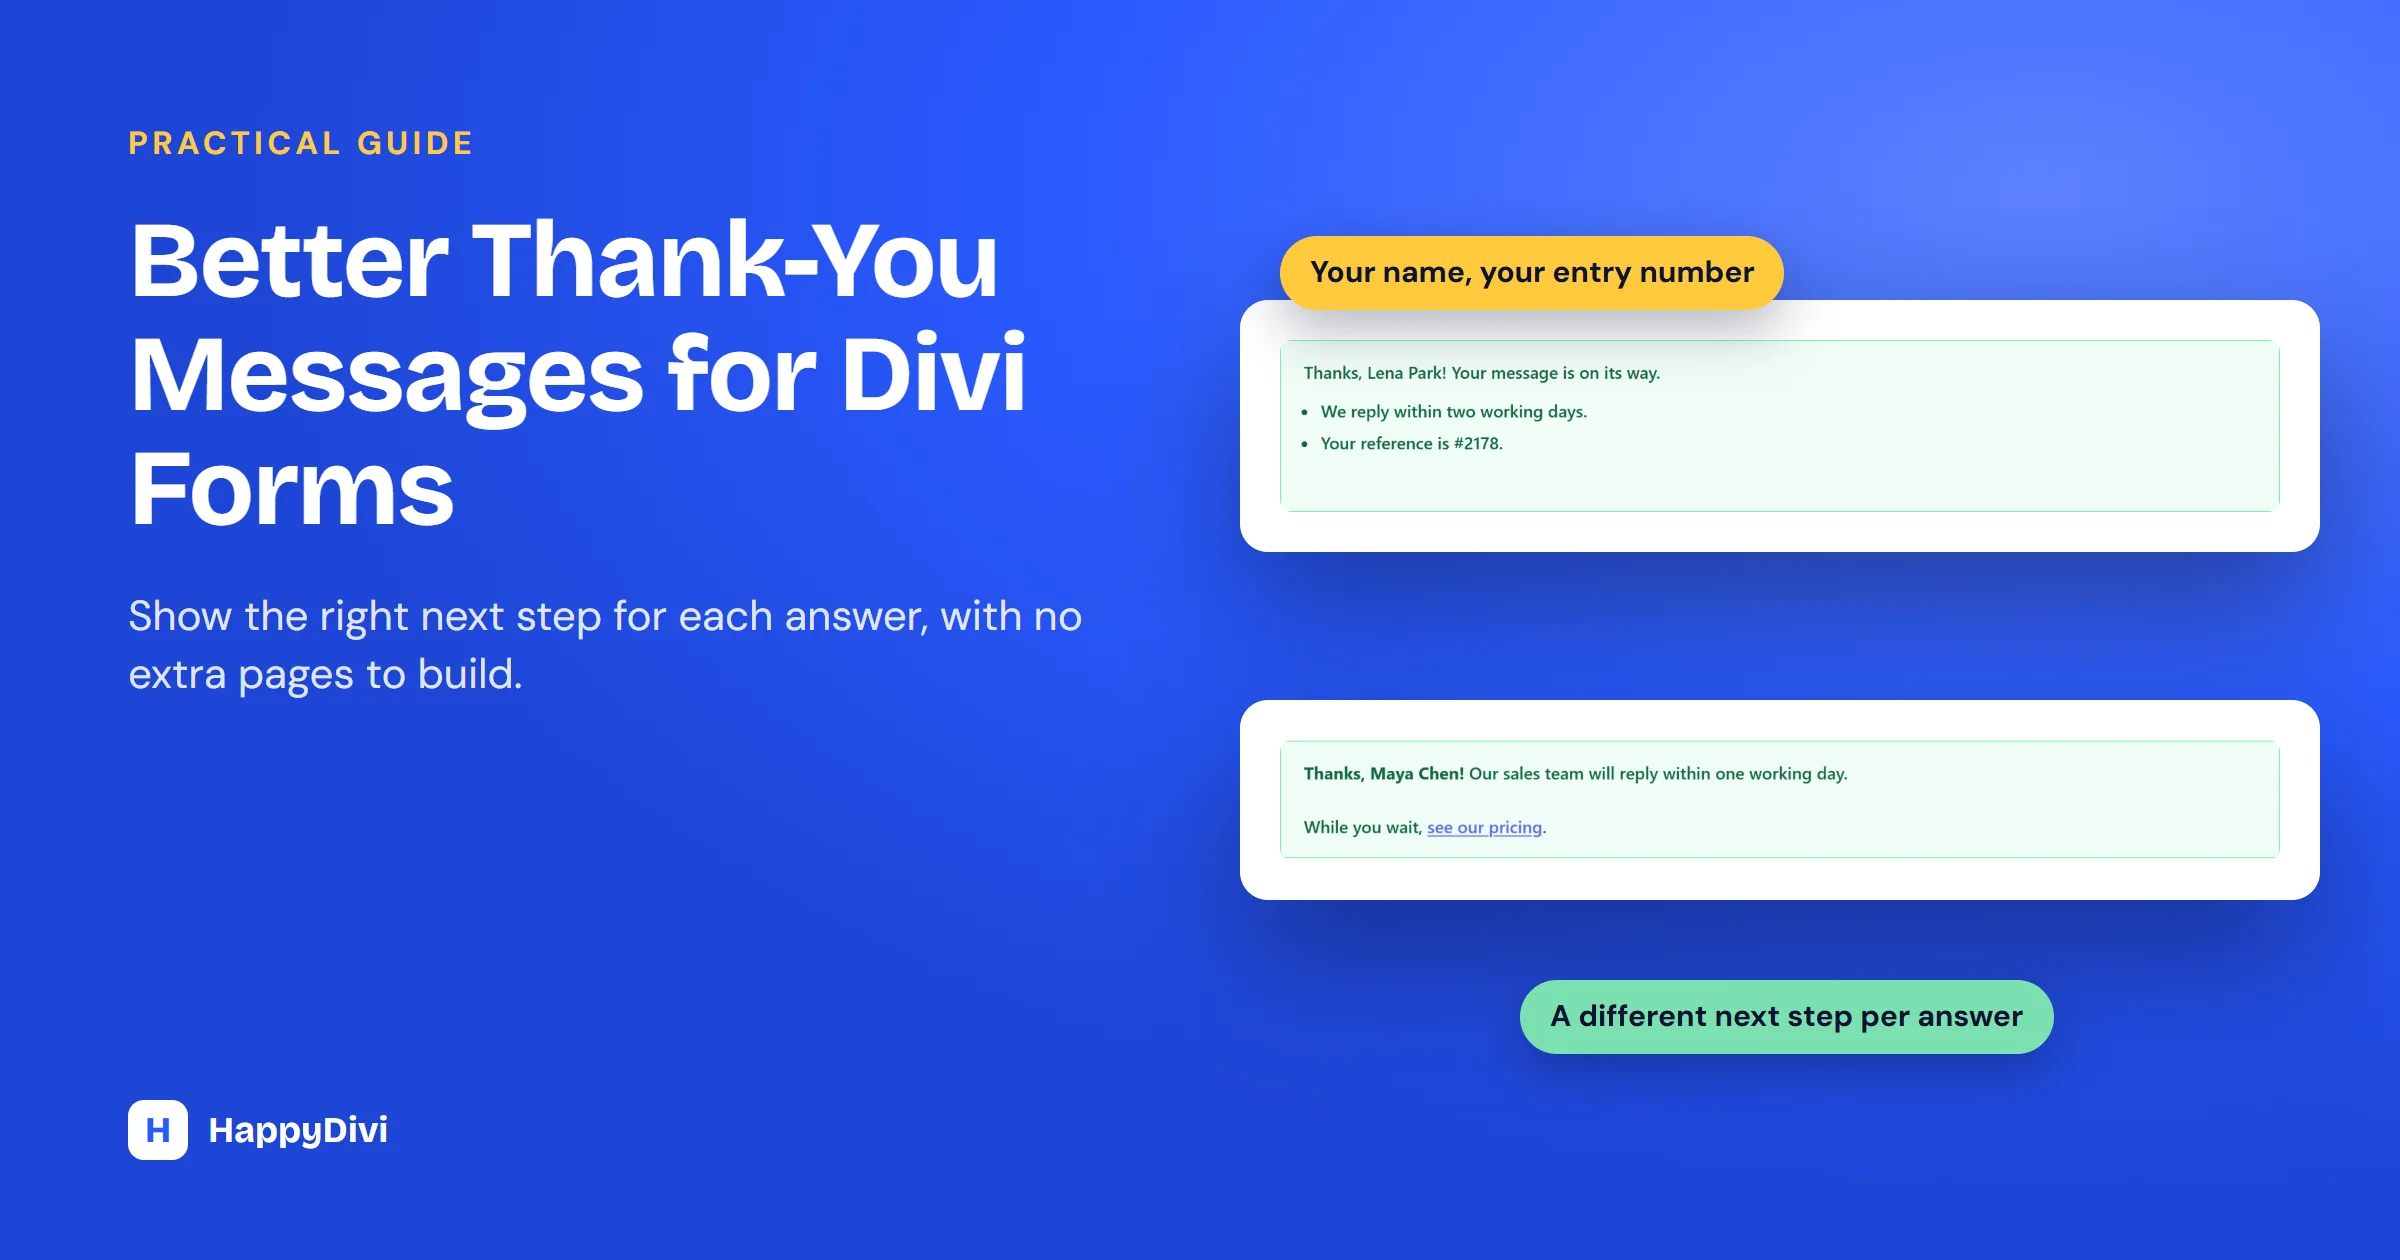
Thanks, %%field_your_name%%! Your message is on its way.

<ul><li>We reply within two working days.</li><li>Your reference is #%%hdf_entry_number%%.</li></ul>- Merge tags add the visitor's answers. Click + Insert merge tag to pick one.
- Line breaks work here as you type them.
- Basic HTML is allowed, including links, bold text and lists.
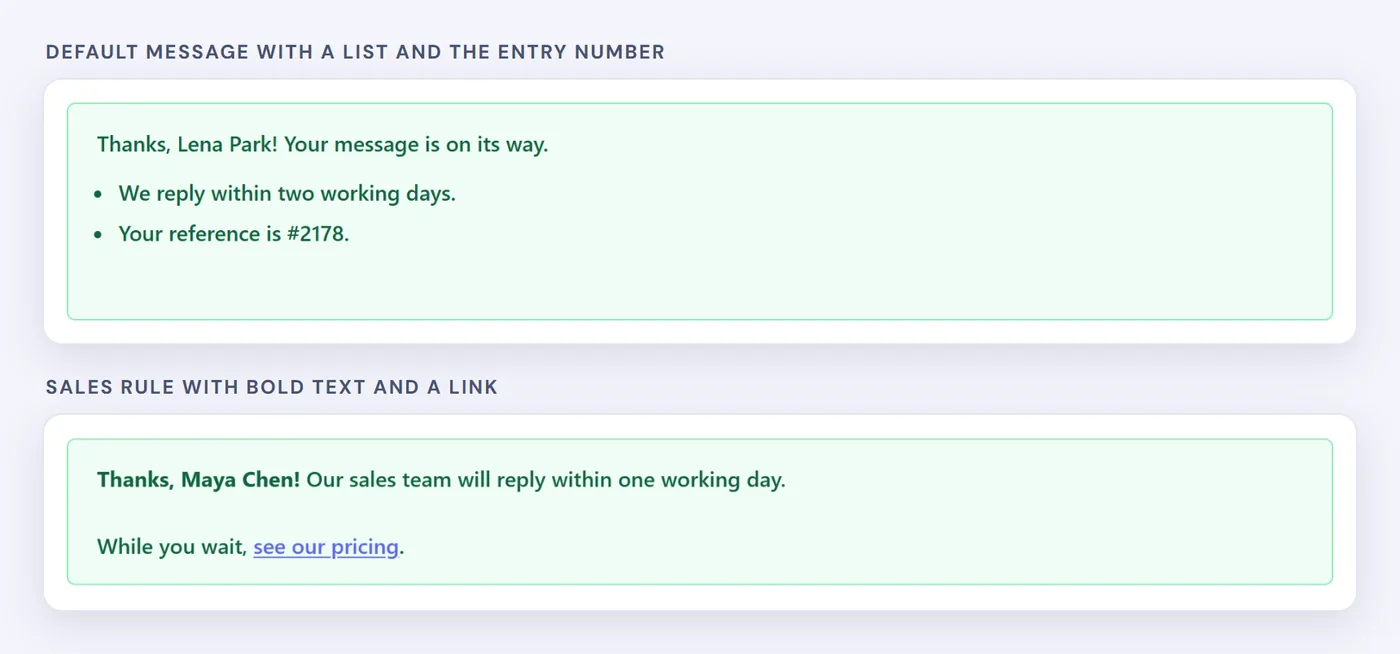
Real results from our test form, including the entry number.
Is it safe to show visitor answers?
Yes. The finished message is cleaned by WordPress before it appears, which removes scripts both from your text and from anything a visitor typed.
Upgrade 2: Send Visitors to the Next Page
Set Default Success Action to Redirect and enter a Default Redirect URL. This suits a dedicated thank-you page, a download page or a booking calendar. You can also open the page in a new tab.
Prefer to confirm first? Choose Message, then Redirect and set Default Redirect Delay. Give people time to read: 5 seconds worked well for our short message.
Upgrade 3: Show a Different Result per Answer
A sales lead and someone with a broken website need different next steps. With HappyDivi Form Pro, Success Rules handle that without any extra forms:
- In Form Settings, find Success Rules and click + Add Success Rule.
- Give it a Label and choose its Success Action.
- Write its message or enter its redirect URL.
- Under Match when, click + Add Condition and choose the field, operator and value.
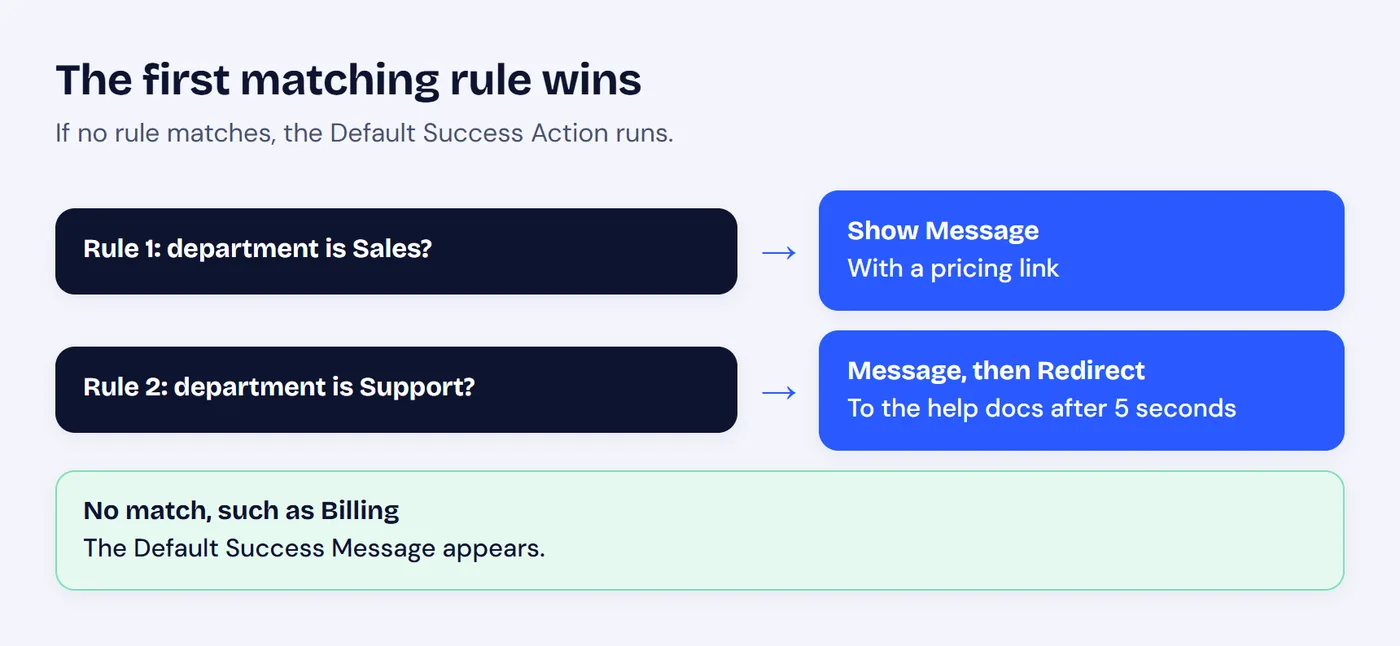
Our test form's rules. Billing has no rule, so it gets the default.
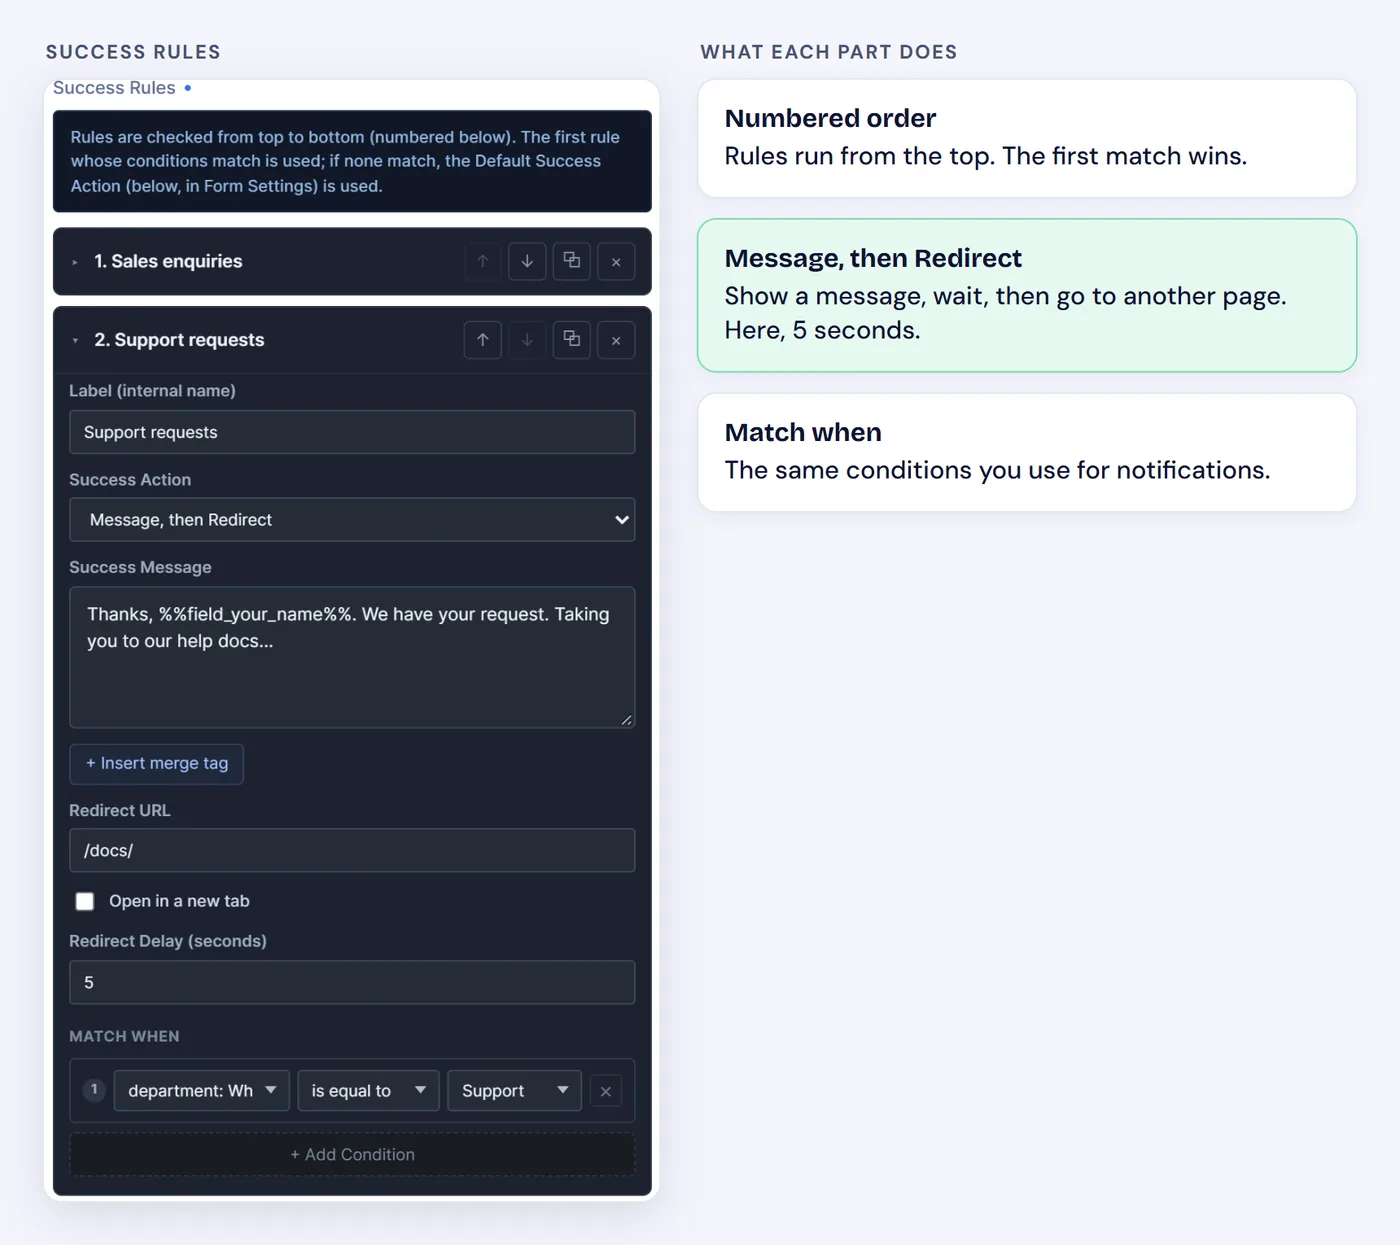
The Support rule shows a message, then opens the help docs.
Order matters
Rules run from the top, and the first match wins. Put your most specific rule first, and use the arrows to reorder them.
Ideas You Can Copy
| Form | If the answer is | Show |
|---|---|---|
| Contact | Sales | A message with a link to pricing |
| Contact | Support | A message, then your help docs |
| Quote request | Budget is under your minimum | A kind message with a link to a cheaper option |
| Event sign-up | Attending in person | Directions and parking details |
| Newsletter and lead magnet | Any answer | A redirect to the download page |
You can also change one sentence inside a message with {{if}}, which is covered in our conditional email guide. To show different fields before the form is sent, use conditional logic.
Test Each Result
Go to HappyDivi Form → Preview & Test, choose your form, enter sample answers and click Run Preview. The Confirmation section names the rule that matched, without saving anything. The entry number stays blank here, because no real entry exists.
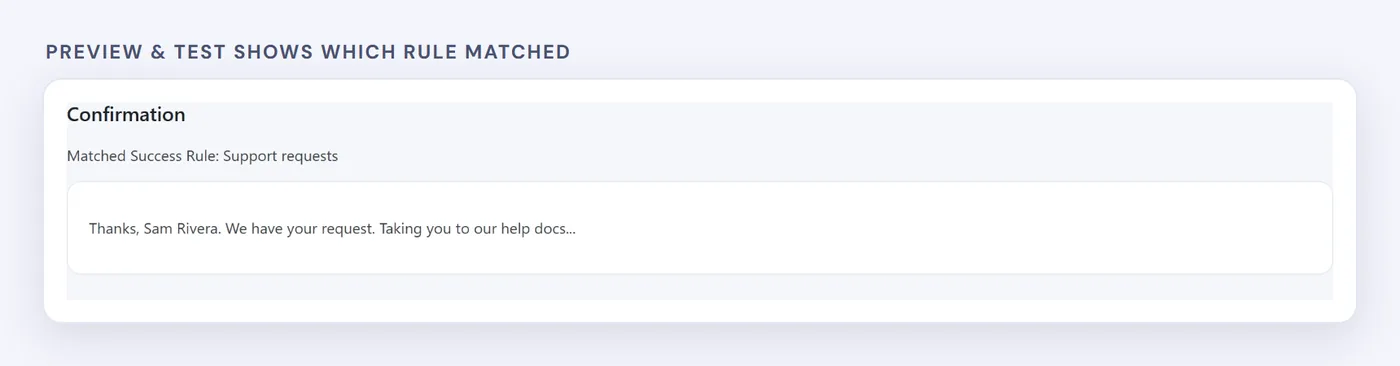
Check every route in seconds.
We also ran real submissions on a test site. Sales showed the message with its pricing link, Support showed its message and moved to the docs page after the delay, and Billing fell through to the default message with its entry number filled in.
Common Problems
A Tag Appears as Plain Text
Check the spelling and the Field ID. An unknown tag stays visible, such as %%field_nmae%%. Using the picker avoids this.
The Wrong Rule Runs
An earlier rule probably matched first. Move the specific rule higher, then run Preview & Test again.
A Payment Form Skips Your Page
On a form with Stripe payments, the visitor goes to Stripe's checkout first. Test the whole payment, including the return to your site.
Frequently asked questions
Can I change the Divi contact form success message?
Yes. Divi's Contact Form has a Success Message setting and can redirect to a URL. HappyDivi Form adds merge tags, basic HTML, a timed redirect and, in Pro, a different result per answer.
Can I redirect to a different page based on the answer?
Yes, with Success Rules in HappyDivi Form Pro. Each rule can have its own redirect URL and conditions.
Can I add a link to the thank-you message?
Yes. HappyDivi Form allows basic HTML in the message, including links, bold text and lists. Scripts are removed for safety.
Are Success Rules in the free version?
No. Success Rules are a Pro feature. Without a Pro license, forms use the Default Success Action.
What happens if no Success Rule matches?
The form uses the Default Success Action, so visitors always see a result.
From HappyDivi
HappyDivi Form
Saves every entry inside WordPress, so a lead never depends on an email arriving.
- 22 field types, multi-step forms and conditional logic
- Native Divi 5 module
Free plan available
Comparing form plugins? See every HappyDivi Form feature compared with Divi Contact Form and Divi Contact Form Helper.
From HappyDivi
HappyDivi Form
Saves every entry inside WordPress, so a lead never depends on an email arriving.
- 22 field types, multi-step forms and conditional logic
- Native Divi 5 module
Free plan available