
To build a Divi WooCommerce product gallery, add HappyDivi Gallery, set Content Source to WooCommerce Products, then turn on prices, sale badges and Add to Cart under Caption. You can add a filter bar, price slider and sort menu without code.
Divi already has a Woo Products module, which is a good fit for a standard product grid. This recipe is for when you want shoppers to do more from the grid, such as sorting, narrowing by price and buying without leaving the page.
Step 1: Choose Which Products Appear
Under Image / Content Source, choose WooCommerce Products, then narrow the list:
- Sale Filter: perfect for a sale landing page.
- Featured Products Only: just your marked favorites.
- Minimum and Maximum Price: for a "gifts under $50" page.
- Stock Status: most shops choose In Stock.
- Included Categories, Product Tags and Minimum Rating: build a page for one collection.
Further down, turn on Show Sort Dropdown In the Frontend and Show Price Range Slider In the Frontend.
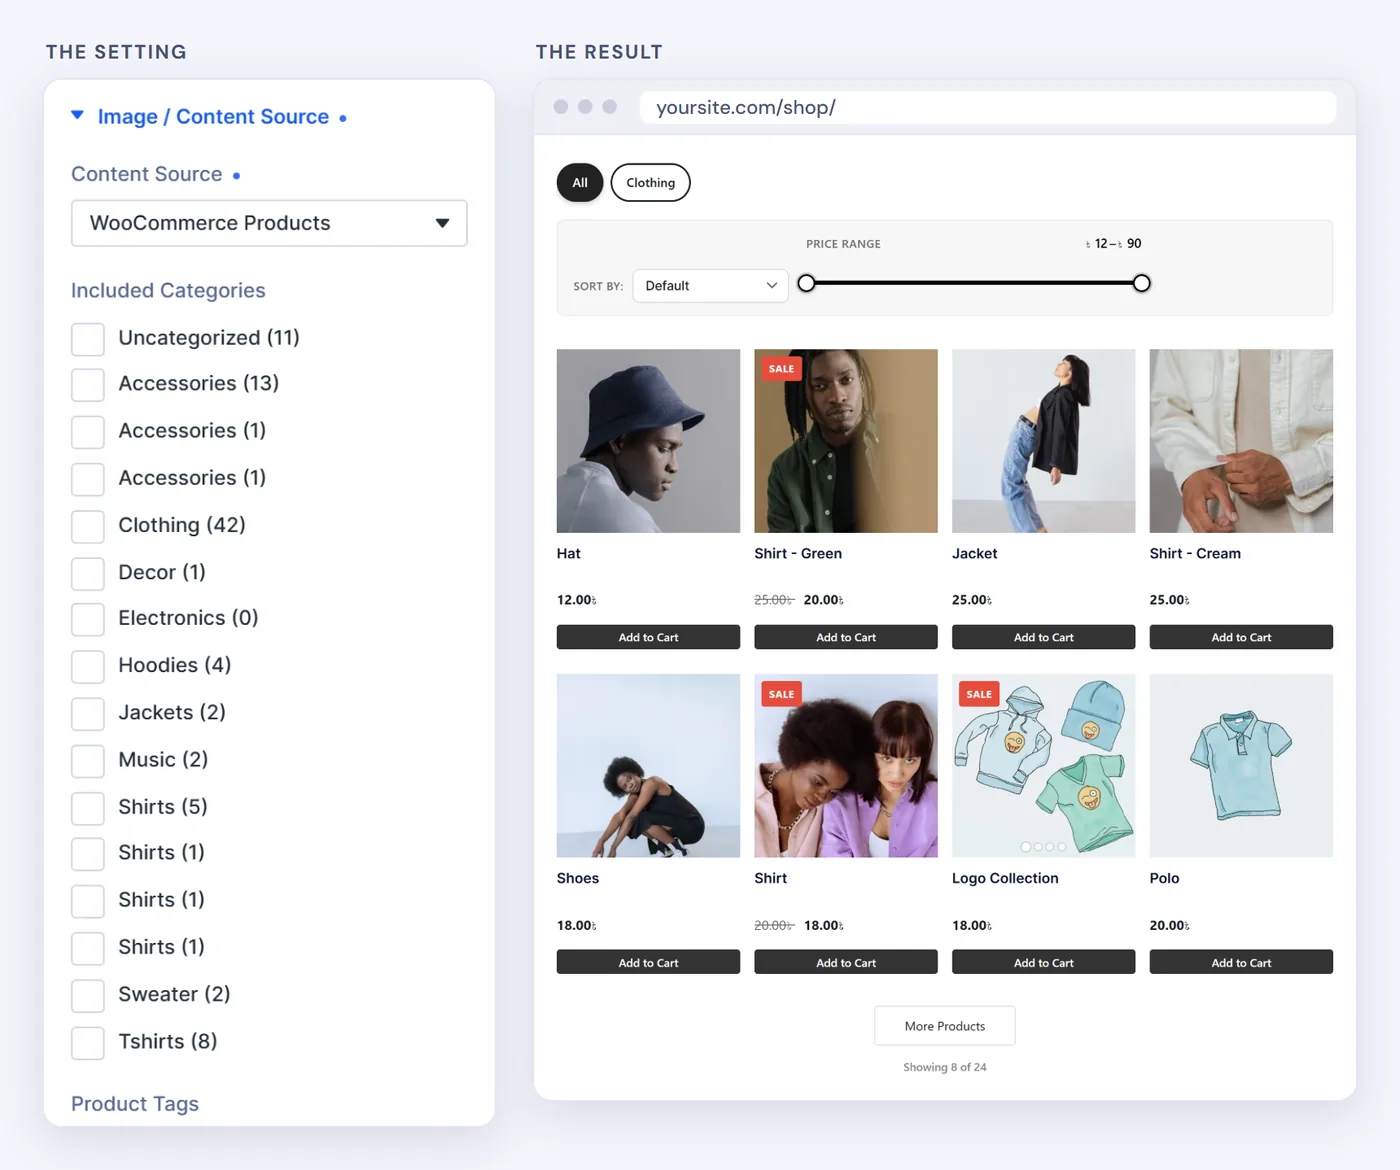
Our demo shop, with the sort menu and price slider on.
Step 2: Show Prices and Add to Cart
Open Caption and turn on what each product should show: Show Title, Show Price, Show Sale Badge and Show Add To Cart Button. For image-led pages, try Show Cart Icon on Hover instead. Set Content Position to Below Image for a clean card.
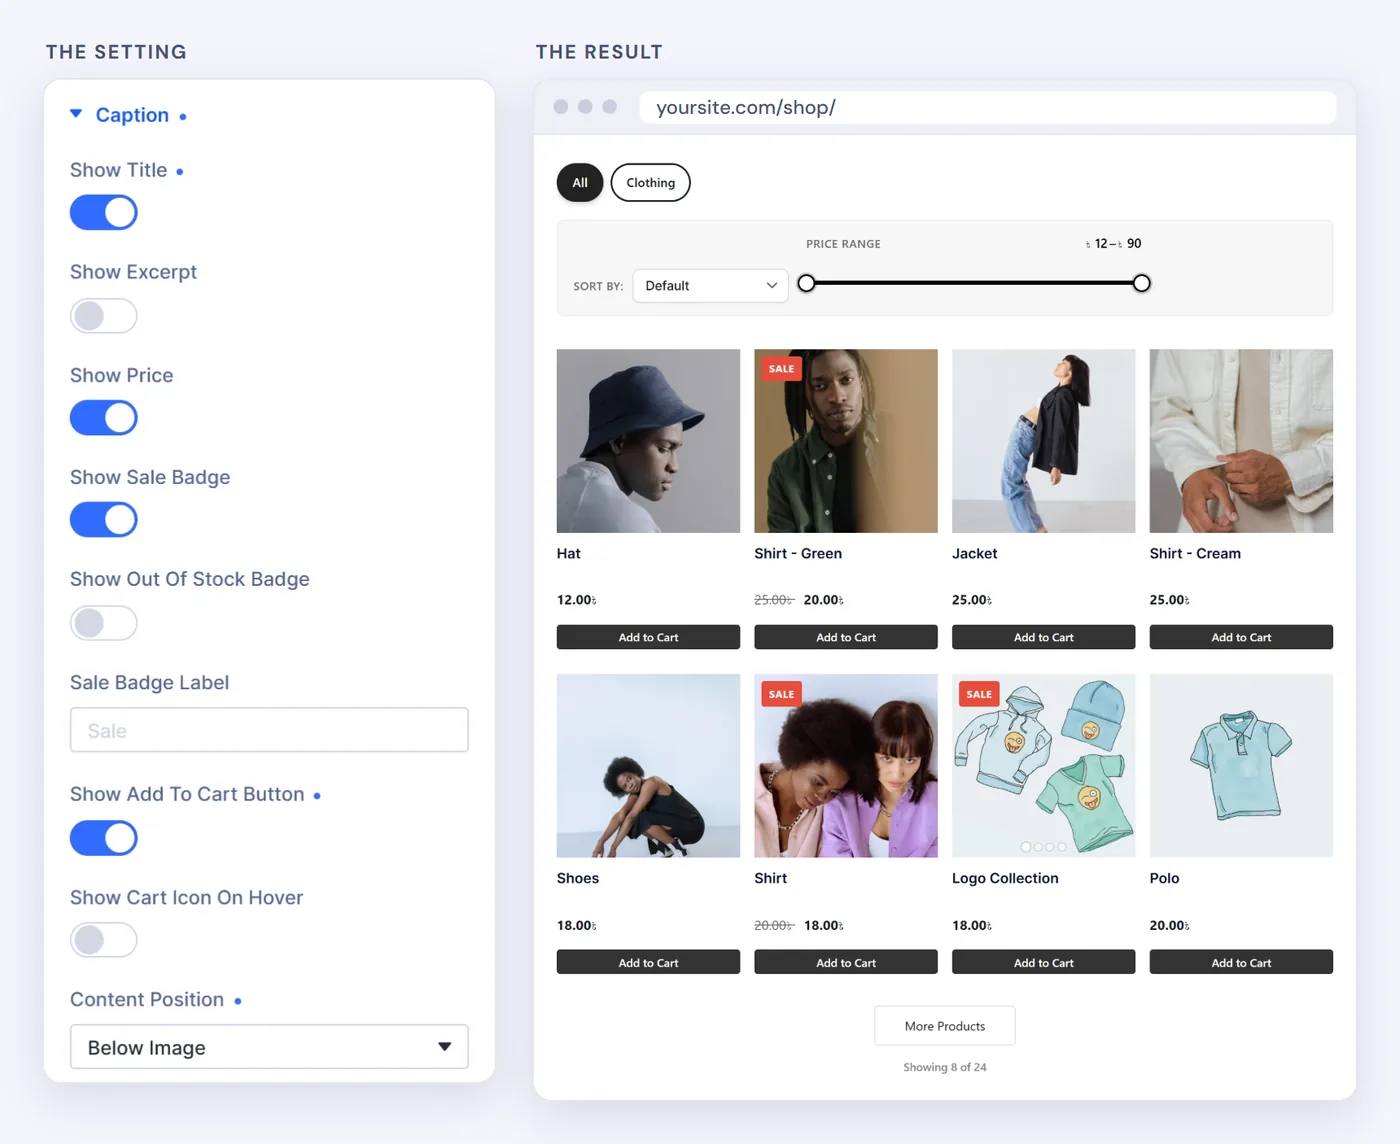
Style badges and buttons under the Design tab.
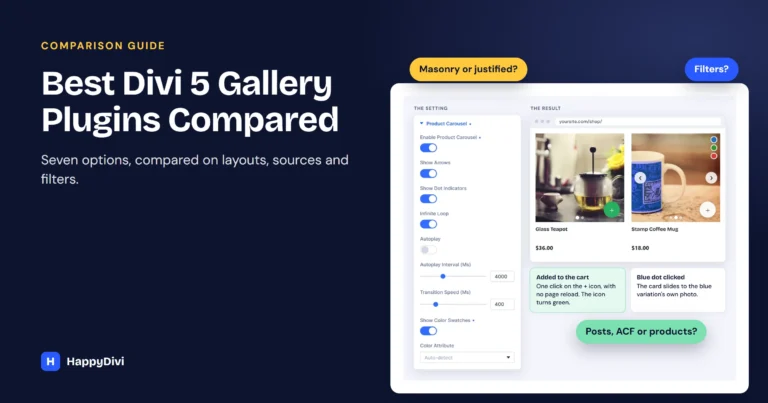
How the hover cart icon behaves. A round + appears over the product photo. We clicked it on a simple product, and this is what happened:
- The product went into the cart with no page reload, and the WooCommerce mini cart refreshed.
- The icon turned green, and it stays green on later visits while the product is in the cart.
- On a variable product, the icon opens the product page instead, because the shopper still has to choose a variation.
You can change the icon's size, color, background and corner radius under the Design tab.
Which button?
Use the full Add to Cart button on landing pages where buying is the goal. Use the hover icon on lookbook pages, where the photos should do the talking.
Step 3: Add the Color Attribute Slider
This is the part shoppers notice. Each card becomes a small slider, and color dots on the photo jump to the matching variation image, so people can compare colors from the grid.
- In WooCommerce, give the variable product a color attribute, and set an image on each variation.
- Under Product Carousel, turn on Enable Product Carousel. Keep arrows and dots on, and leave Autoplay off so shoppers stay in control.
- Turn on Show Color Swatches. Color Attribute stays on Auto-detect, or you can pick your attribute if it has another name.
The slider uses the featured image, then the product gallery images, then any image that exists only on a variation. Simple products get a slider too, as long as they have gallery images.
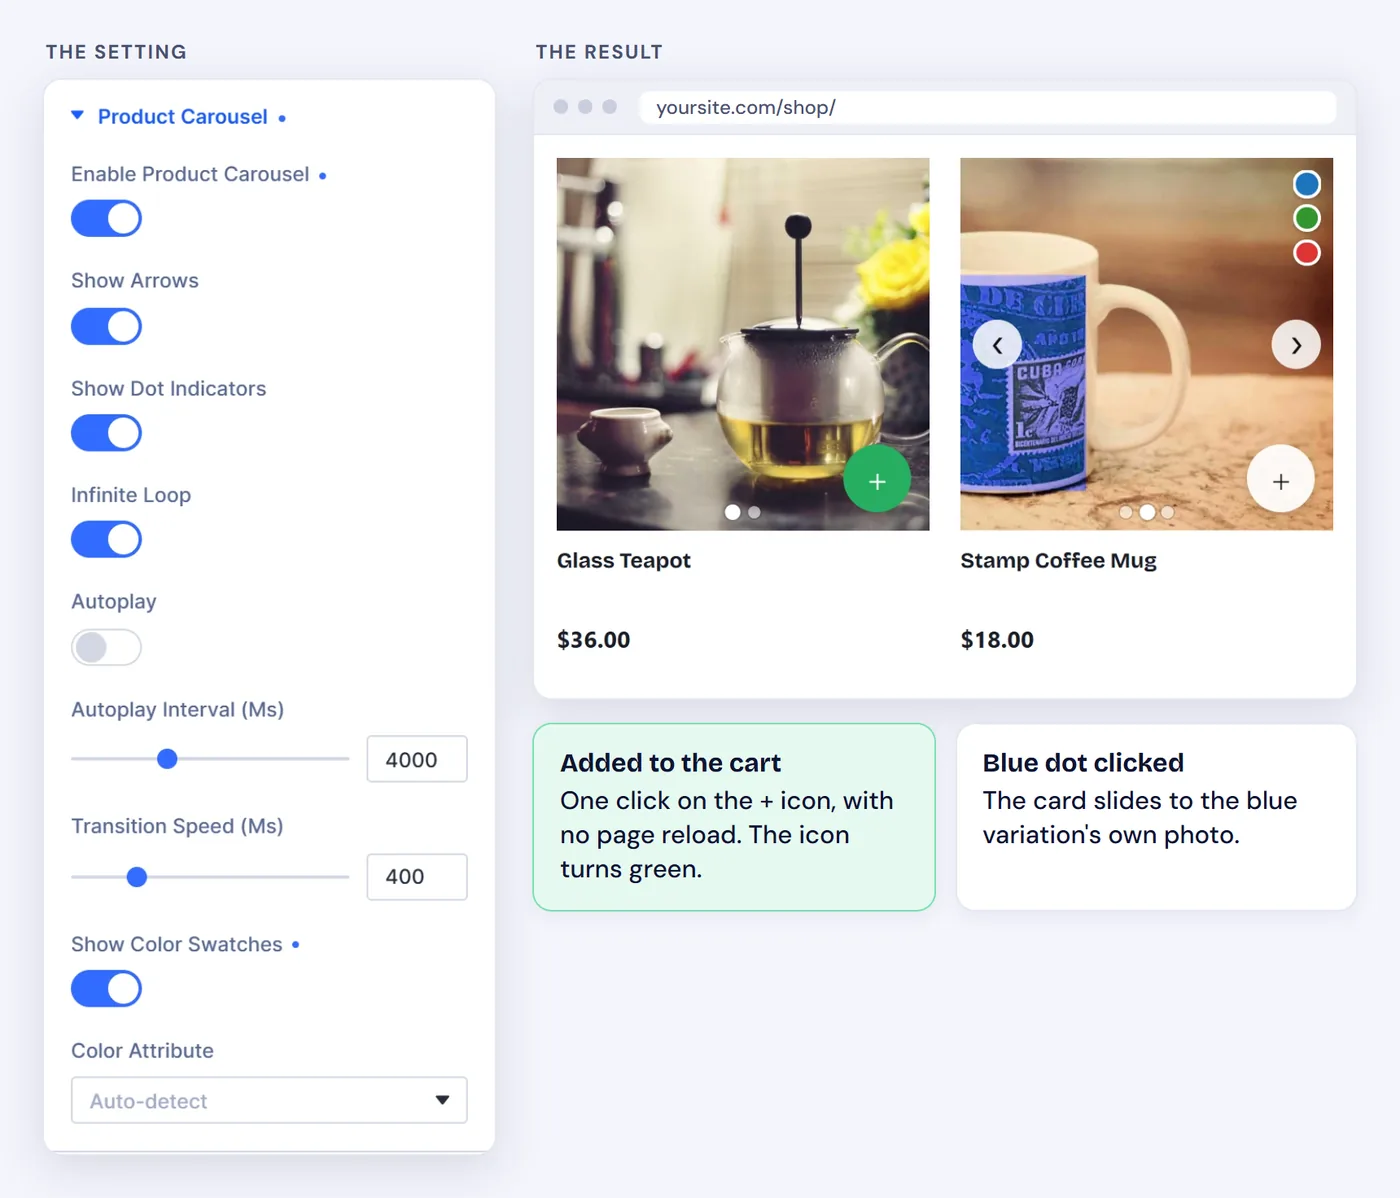
Our test shop: the teapot is in the cart, and the blue dot switched the mug to its blue variation image.
No dots showing?
Dots appear only when a color matches a slide. Check that the product is variable, that each variation has its own image, and that Enable Product Carousel is on.
Divi's own Woo Products module has no per-card slider or color dots. Some Divi add-ons offer swatches on their own. The advantage here is having the slider, color dots, cart icon, filters and price slider together in one gallery module.
Step 4: Add a Category Filter Bar
Under Filter Bar, turn on Enable Category Filter, choose Pills, and turn on Sticky Filter Bar so the controls stay on screen. Turn on Save Filter in URL too, so an email campaign can link straight to one category, such as ?hdg_cat=sweaters.
Step 5: Finish the Layout
- Gallery Layout: Grid with Square (1:1) or Portrait (3:4), so each product carries the same weight.
- Columns: 4 on desktop, 2 on tablet, 1 or 2 on phone.
- Click Action: Go to Post / Product URL, or Open in Lightbox.
- Pagination: Load More Button with 12 per page. See the pagination guide.
The Recipe at a Glance
| Group | Setting |
|---|---|
| Content Source | WooCommerce Products, In Stock, Sort and Price Slider on |
| Caption | Title, Price, Sale Badge, Add to Cart, Below Image |
| Product Carousel | On, arrows and dots on, autoplay off, Show Color Swatches on |
| Gallery Layout | Grid, Square, 4 columns |
| Filter Bar | Pills, Sticky on, Save Filter in URL on |
| Pagination | Load More, 12 per page |
Frequently asked questions
Do I need a separate WooCommerce page template?
No. The gallery is a normal Divi 5 module, so you can place it on any page, landing page or Theme Builder layout.
Can I make a sale or under-$50 page?
Yes. Set Sale Filter to On Sale Only, or set a Maximum Price, and the gallery shows only matching products.
Can shoppers add to the cart without leaving the page?
Yes, for simple products. The Add to Cart button and the hover cart icon add the product with no page reload. A variable product opens its product page so the shopper can choose a variation.
How do I show variation images in a Divi product grid?
Set an image on each variation in WooCommerce, then turn on Enable Product Carousel and Show Color Swatches. Clicking a color dot moves the card to that variation's image.
My color attribute has a different name. Will swatches work?
Yes. Color attributes are auto-detected, and you can choose the attribute yourself for any other name.
Does this replace my WooCommerce shop page?
It can sit on a landing page or a custom shop layout. WooCommerce still runs your cart and checkout, and the gallery only changes how products are browsed.
From HappyDivi
HappyDivi Gallery
One Divi 5 module for galleries from WooCommerce, custom post types and ACF fields.
- Grid, Masonry and Justified layouts
- Built-in lightbox
30-day money-back guarantee
Want the full picture? The Complete Divi 5 Gallery Guide covers every source, layout, lightbox, filter and pagination option.
From HappyDivi
HappyDivi Gallery
One Divi 5 module for galleries from WooCommerce, custom post types and ACF fields.
- Grid, Masonry and Justified layouts
- Built-in lightbox
30-day money-back guarantee